Kappa
“Great things are not done by impulse, but by a series of small things brought together.”
Hack The Box
Common Pitfalls
While performing penetration tests or attacking HTB boxes/labs, we may make many common mistakes that will hamper our progress. In this section, we will discuss some of these common pitfalls and how to overcome them.
VPN Issues
We may sometimes face issues related to VPN connections to the HTB labs network. First, we should ensure that we are indeed connected to the HTB network.
Still Connected to VPN
The easiest method of checking if we have successfully connected to the VPN network is by checking whether we have Initialization Sequence Completed at the end of our VPN connection messages:
kappajester83@htb[/htb]$ sudo openvpn ./htb.ovpn
...SNIP...
Initialization Sequence Completed
Getting VPN Address
Another way of checking whether we are connected to the VPN network is by checking our VPN tun0 address, which we can find with the following command:
kappajester83@htb[/htb]$ ip -4 a show tun0
          6: tun0: "POINTOPOINT,MULTICAST,NOARP,UP,LOWER_UP" mtu 1500 qdisc pfifo_fast state UNKNOWN group default qlen 500
            inet 10.10.10.1/23 scope global tun0
              valid_lft forever preferred_lft forever
As long we get our IP back, then we should be connected to the VPN network.
Checking Routing Table
Another way to check for connectivity is to use the command sudo netstat -rn to view our routing table:
kappajester83@htb[/htb]$ sudo netstat -rn
[sudo] password for user:
          Kernel IP routing table
          Destination     Gateway         Genmask         Flags   MSS Window  irtt Iface
          0.0.0.0         192.168.195.2   0.0.0.0         UG        0 0          0 eth0
          10.10.14.0      0.0.0.0         255.255.254.0   U         0 0          0 tun0
          10.129.0.0      10.10.14.1      255.255.0.0     UG        0 0          0 tun0
          192.168.1.0     0.0.0.0         255.255.255.0   U         0 0          0 eth0
Pinging Gateway
From here, we can see that we are connected to the 10.10.14.0/23 network on the tun0 adapter and have access to the 10.129.0.0/16 network and can ping the gateway 10.10.14.1 to confirm access.
kappajester83@htb[/htb]$ ping -c 4 10.10.14.1
          PING 10.10.14.1 (10.10.14.1) 56(84) bytes of data.
          64 bytes from 10.10.14.1: icmp_seq=1 ttl=64 time=111 ms
          64 bytes from 10.10.14.1: icmp_seq=2 ttl=64 time=111 ms
          64 bytes from 10.10.14.1: icmp_seq=3 ttl=64 time=111 ms
          64 bytes from 10.10.14.1: icmp_seq=4 ttl=64 time=111 ms

          --- 10.10.14.1 ping statistics ---
          4 packets transmitted, 4 received, 0% packet loss, time 3012ms
          rtt min/avg/max/mdev = 110.574/110.793/111.056/0.174 ms
Finally, we can either attack an assigned target host on the 10.129.0.0/16 network or begin enumeration for live hosts.
Working on Two Devices
The HTB VPN cannot be connected to more than one device simultaneously. If we are connected on one device and try to connect from another device, the second connection attempt will fail.
For example, this can happen when our VPN connection is connected in our PwnBox, and then we try to connect to it from our Parrot VM at the same time. Alternatively, perhaps we are connected on our Parrot VM, and then we want to switch to a Windows VM to test something.
Checking Region
If we feel a noticeable lag in our VPN connection, such as latency in pings or ssh connections, we should ensure that we are connected to the most appropriate region. HTB provides VPN servers worldwide, in Europe, USA, Australia, and Singapore. Ideally, it would help if we tried to connect to the server closest to us to get the best possible connection.
To change our VPN Server, go to HackTheBox, click on the top-right icon that says Lab Access or Offline, click on Labs, and then click on OpenVPN. Once we do, we should be able to pick our VPN server location and pick any of the servers within that region:
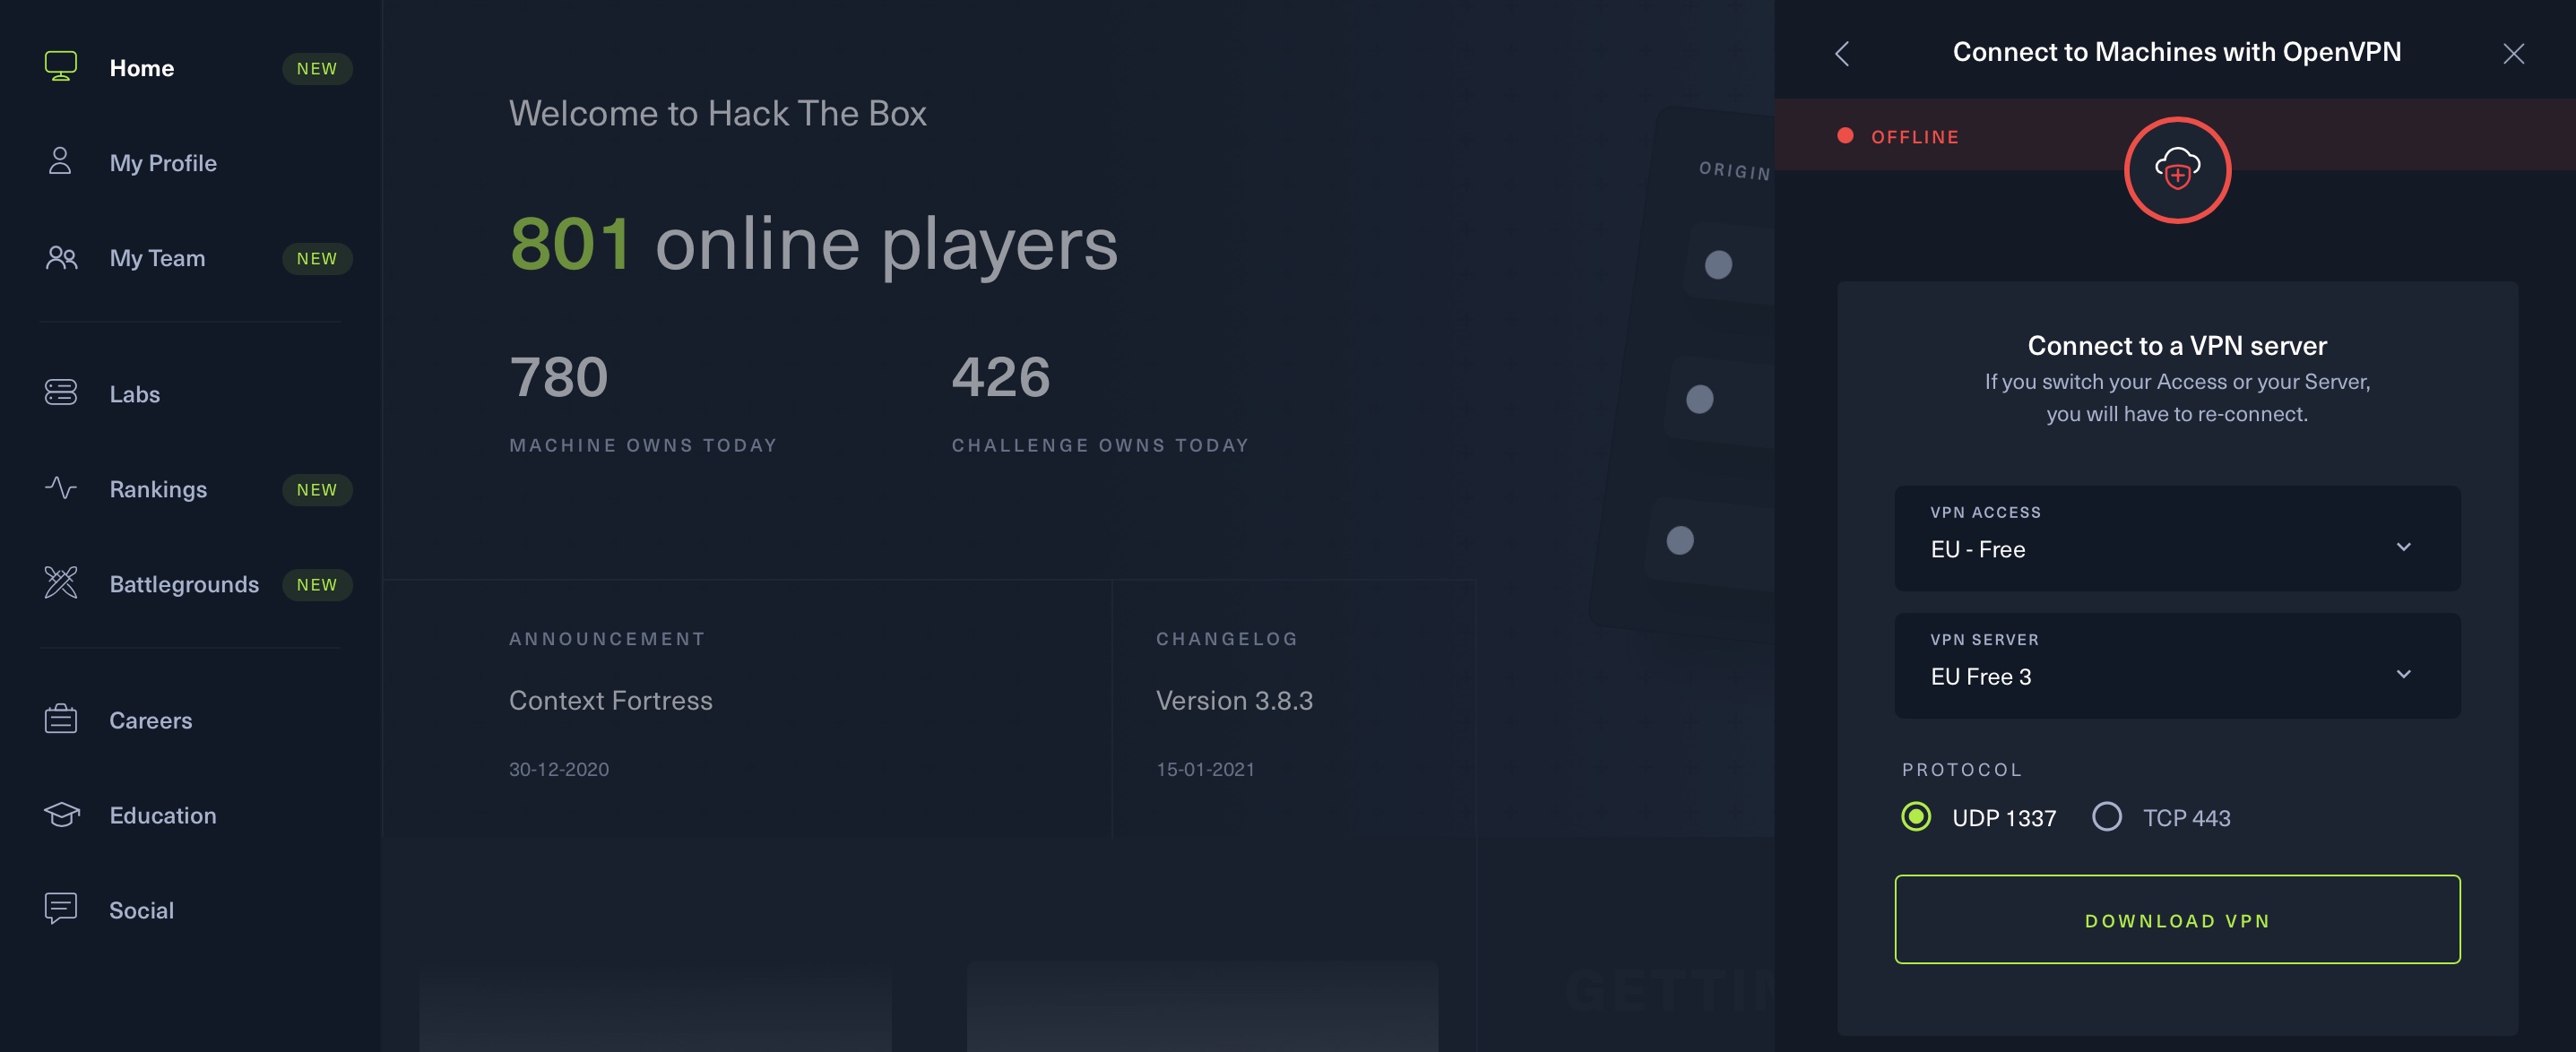
Note: Users with a free subscription only can connect to 1-3 free servers in each region. Users with a VPN subscription can connect to VIP servers, which provide a faster connection with less traffic.
VPN Troubleshooting
In case we face any technical issues when connecting to the VPN, we can find detailed guidance on troubleshooting VPN connections on this HackTheBox Help page.
Burp Suite Proxy Issues
Burp Suite is a crucial tool during web application penetration tests (as well as other assessment types). Burp Suite is a web application proxy and can cause a few issues on our systems.
Not Disabling Proxy
When we turn the Burp proxy in our browser, Burp will start to capture our traffic and intercept our requests. This will make it stop any requests we make in the browser, i.e., visiting a page until we go to Burp, examine the request, and forward the request.
A common pitfall is forgetting to turn off the browser proxy after closing Burp, so it keeps intercepting our requests. If this happens, we will see that our browser is not loading any pages, so we should check if the browser proxy is still on. We can do that by clicking on the Foxy Proxy plugin icon in Firefox, and making sure it's set to Turn Off:
If we are not using a plugin like Foxy Proxy, we can check the browser's connection settings and make sure the proxy is turned off. Once we do, we should be able to continue browsing without any issues.
Changing SSH Key and Password
In case we start facing some issues with connecting to SSH servers or connecting to our machine from a remote server, we may want to renew or change our SSH key and password to make sure they are not causing any issues. We can do this with the ssh-keygen command, as follows:
kappajester83@htb[/htb]$ ssh-keygen
          Generating public/private rsa key pair.
          Enter file in which to save the key (/home/parrot/.ssh/id_rsa):
          Enter passphrase (empty for no passphrase):
          Enter same passphrase again:

          Your identification has been saved in /home/parrot/.ssh/id_rsa
          Our public key has been saved in /home/parrot/.ssh/id_rsa.pub
          The key fingerprint is:
          SHA256:...SNIP... parrot@parrot
          The key's randomart image is:
          +---[RSA 3072]----+
          |            o..  |
          |     ...SNIP     |
          |     ...SNIP     |
          |     ...SNIP     |
          |     ...SNIP     |
          |     ...SNIP     |
          |     ...SNIP     |
          |       + +oo+o   |
          +----[SHA256]-----+
By default, SSH keys are stored in the .ssh folder within our home folder (for example, /home/htb-student/.ssh). If we wanted to create an ssh key in a different directory, we could enter an absolute path for the key when prompted. We can encrypt our SSH key with a password when prompted or keep it empty if we do not want to use a password.
Getting Started
- Infosec Overview
- Getting Started with a Pentest Distro
- Staying Organized
- Connecting Using VPN
- Common Terms
- Basic Tools
- Service Scanning
- Web Enumeration
- Public Exploits
- Types of Shells
- Privilege Escalation
- Transferring Files
- Starting Out
- Navigating HTB
- Nibbles - Enumeration
- Nibbles - Web Footprinting
- Nibbles - Initial Foothold
- Nibbles - Privilege Escalation
- Nibbles - Metasploit
- ~ Common Pitfalls
- Getting Help
- Next Steps
- Knowledge Check